The exact prep sequence that determines whether cabinet paint holds 7 years or 7 months.
Our team has seen perfectly good paint peel off kitchen cabinets simply because the surface was not prepped correctly. This kitchen cabinet prep stage dictates whether your new color lasts a decade or chips in a week. Homeowners in Northern New Jersey often spend between $1,200 and $3,500 for a professional kitchen cabinet painting job in 2026.
We want to help you protect that investment with a clear plan.
Let us review the exact cabinet painting prep process, identify common amateur mistakes, and look at the best environment for spraying doors.
The Standard Cabinet Prep Sequence
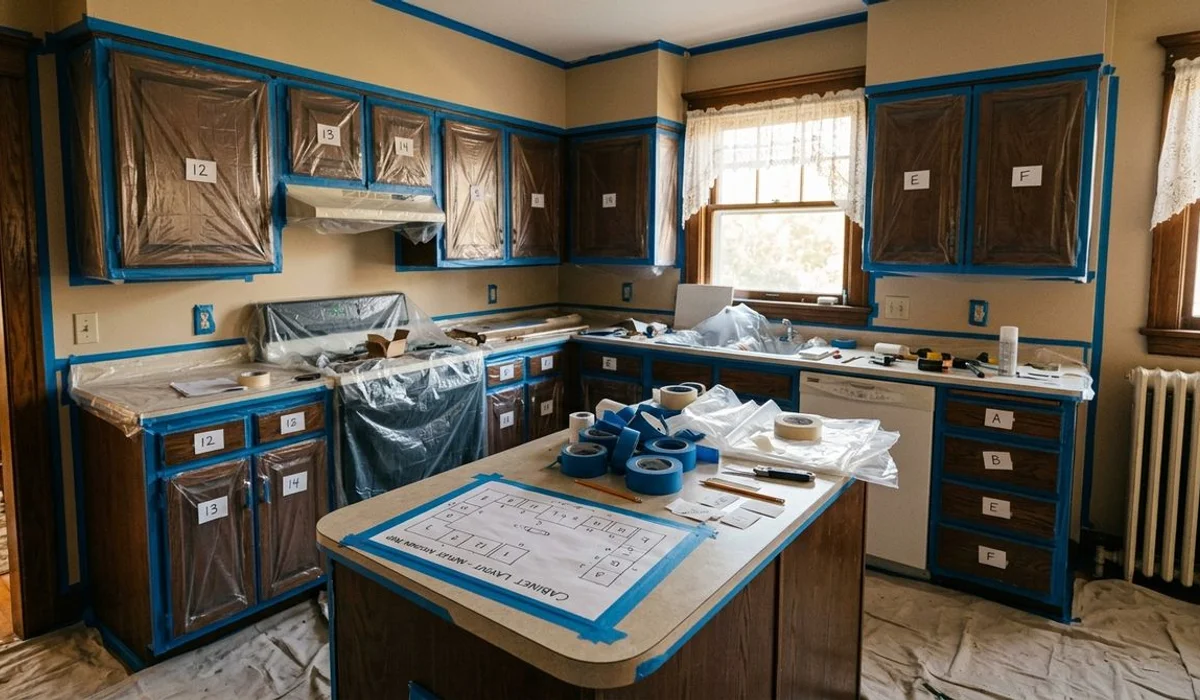
Disorganization will cause major headaches during reassembly. Our technicians rely on a strict labeling system to prevent doors from ending up on the wrong hinges.
Getting everything properly tagged takes just a few extra minutes. If you are wondering how to prep cabinets for paint, here is how you handle the initial breakdown.
Phase 1: Disassembly and Documentation
- Inventory and take photo documentation before anything moves.
- Remove hardware like hinges, pulls, and knobs.
- Label and bag the hardware by specific door.
- Remove all doors and drawer fronts.
- Label the inside of each door with masking tape and a marker (1, 2, 3, etc.).
Phase 2: Deep Cleaning and Repair
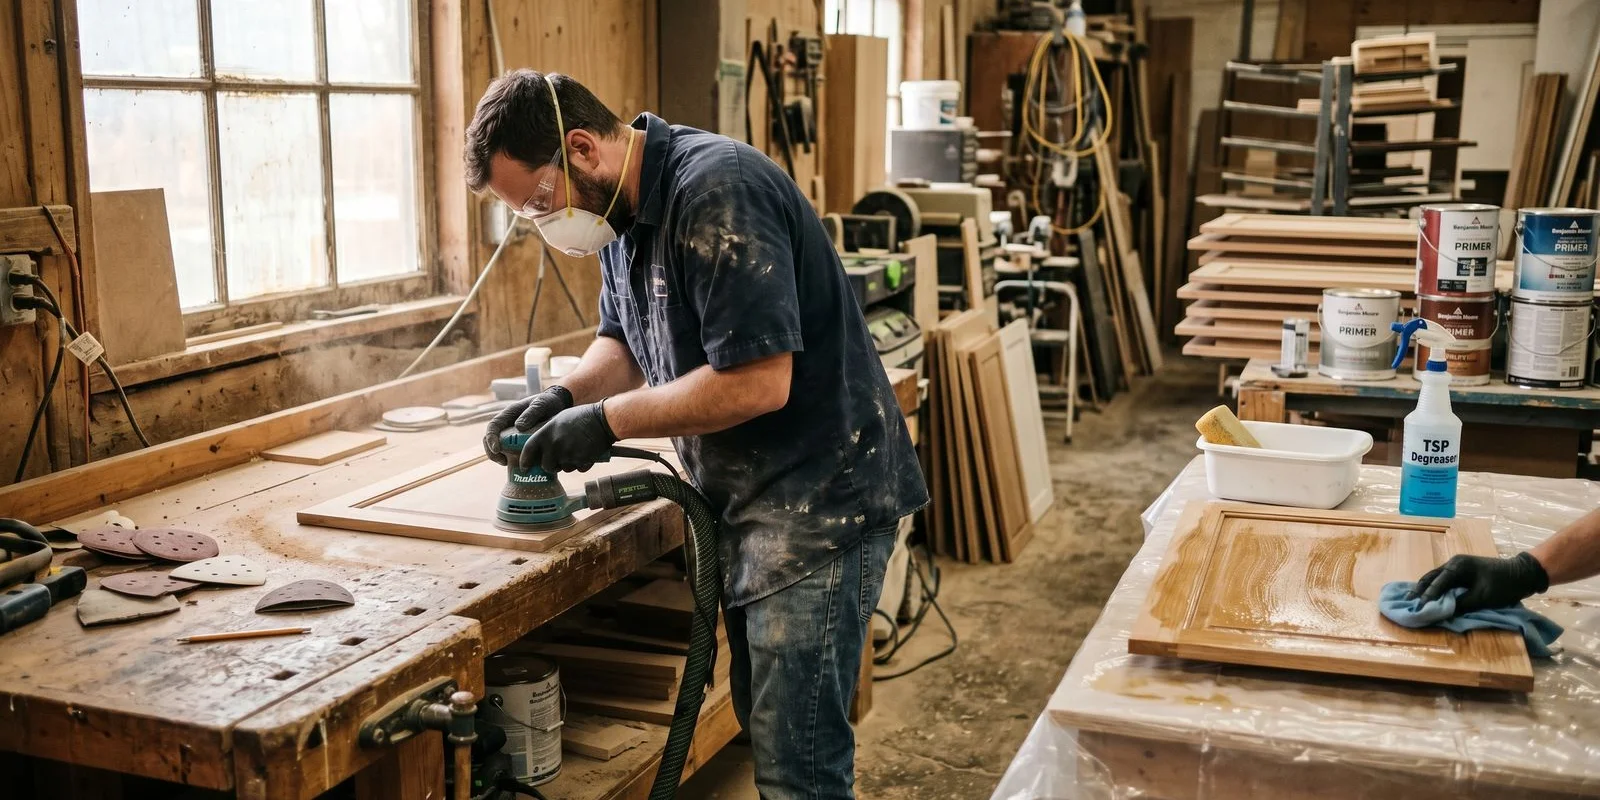
We always start the chemical phase by attacking years of cooking grease. A 2024 cleaning industry consensus highlights Krud Kutter as a top choice for cabinet degreasing.
This water-based cleaner cuts through heavy residue without leaving the harmful fumes associated with Trisodium Phosphate (TSP). Our crews apply two passes of degreaser to guarantee a spotless surface. Rinsing thoroughly prevents cleaner residue from blocking paint adhesion.
Any physical damage needs attention next.
- Degrease the surfaces using a strong product like Krud Kutter or TSP.
- Do at least two passes for heavy buildup.
- Rinse and dry the wood thoroughly.
- Repair damage by filling dents and cracks with wood filler or Bondo.
Phase 3: Surface Etching and Masking
We never skip the sanding step, even if a primer claims it requires zero prep. Scuffing the wood with 220-grit sandpaper creates microscopic scratches.
These tiny grooves give the new primer the necessary texture to bite into the surface. Our prep work finishes with an exhaustive dust removal process.
A single speck of dust can ruin a perfectly smooth topcoat. Protecting the rest of the kitchen keeps the work zone contained.
- Scuff sand everything with 220-grit paper.
- Feather repaired areas until they are perfectly smooth.
- Vacuum the area and wipe surfaces with a tack cloth.
- Mask cabinet boxes on-site by placing plastic over counters.
- Put down floor drop cloths and tape inside the cabinet fronts.
Phase 4: Priming, Painting, and Curing
We select primers based on the specific wood species in your kitchen. Oak and maple require stain-blocking primers to stop natural wood tannins from bleeding through the paint.
Laminate and MDF surfaces need a high-quality bonding primer instead. Our painters apply at least two topcoats for maximum durability.
The local climate heavily dictates the curing schedule. Summer humidity in Northern New Jersey often exceeds 70 percent, which can keep latex paint soft for weeks.
- Prime with a bonding primer on laminate or MDF.
- Use a stain-blocking primer on oak or maple.
- Sand the primer lightly with 320-grit paper.
- Apply a minimum of two topcoats.
- Sand lightly between coats using 320-grit paper.
- Allow two to three days minimum for the paint to cure.
- Reinstall the doors and rehang the hardware.
What Gets Skipped by Bad Painters
We fix quite a few botched jobs that stem from rushed preparation. Repairing peeling paint means stripping the doors down to bare wood and starting over entirely.
The cost to redo a failed kitchen cabinet project often exceeds $60 per linear foot. Our quality control checks ensure none of these critical steps slip through the cracks.
Homeowners should watch out for contractors who speed through the early stages. Common shortcuts lead directly to a ruined finish.
- Skipping the degreaser: Assuming the cabinets look clean is not the same as thoroughly degreased.
- Avoiding the sanding phase: Using a bonding primer as a substitute for actual physical prep work fails quickly.
- Ignoring door labels: Mixing up doors leads to severe hinge misalignment on the reinstall.
- Rushing the cure time: Doors reinstalled at the 24-hour mark will easily chip around the hinges.
- Eyeballing new hardware: Handle holes drilled without a proper hardware template come out crooked.
Off-Site vs On-Site Door Work
Our facility uses a dedicated spray booth to control the drying environment perfectly. The ideal window for curing interior latex paint is between 50 and 80 degrees Fahrenheit.
Maintaining 40 to 50 percent relative humidity prevents the finish from staying permanently soft. We highly recommend removing doors from the home to achieve these exact parameters.
Trying to replicate a clean room in a busy household is nearly impossible. The comparison below highlights why taking pieces away yields a superior result.
| Feature | Off-Site Door Work (Ideal) | On-Site Door Work (Not Ideal) |
|---|---|---|
| Environment Control | Spray booth provides a completely dust-free space. | High dust risk from normal daily household activity. |
| Ventilation and Odor | Proper commercial ventilation eliminates interior odor issues. | Fumes linger in the house with limited airflow options. |
| Efficiency | Multiple doors can be sprayed and dried at once. | Requires extensive prep masking around the entire kitchen. |
| Weather Dependency | Climate-controlled facility ensures consistent drying. | Garage setups rely heavily on unpredictable outside weather. |
We always spray your removable pieces in our controlled shop environment. The remaining box fronts get hand-painted in your home using a quality brush and mini-roller combination. A high-volume low-pressure (HVLP) sprayer is another great option for the frames if careful masking is applied.
Our standard approach is detailed on our interior painting service resource page. Homeowners looking to budget for their specific layout should read our guide on the average cabinet painting cost.
A clear estimate helps you plan the upgrade accurately. We encourage you to reach out for a consultation if you are ready to start the cabinet painting process. Professional results require proper planning from day one.