Prep, primer, and color-coat techniques for plaster walls in pre-war Bloomfield, Montclair, and Nutley homes.
You know how a simple room refresh can quickly turn into a massive repair job when the walls start crumbling. For anyone tackling a project involving painting plaster walls, NJ offers a unique challenge due to its aging housing stock. We see this exact scenario constantly in historic properties across the region.
Standard drywall techniques simply fail on these older surfaces.
Let’s break down the distinct characteristics of historic materials, look at the proper repair sequence, and explore how to prevent your fresh topcoat from peeling. Our step-by-step guide covers everything required for a permanent fix.
Why Painting Plaster Walls NJ Needs Different Prep
Traditional plaster behaves completely differently than modern gypsum drywall because it is significantly denser. You will find that these older surfaces are far less absorbent, making them highly prone to spiderweb cracking. Our crews regularly encounter these exact conditions in pre-war homes throughout Bloomfield, Montclair, Nutley, and Belleville.
In fact, nearly 60% of the housing stock in towns like Montclair was built before 1940. This older construction typically features three thick coats applied over wood lath, creating a solid wall structure that measures between 7/8 to 1 inch thick. We approach these historic walls with deep respect for their incredible durability and acoustic performance.
A traditional plaster wall achieves a Sound Transmission Class rating that easily outperforms modern 1/2-inch drywall. Applying standard patching methods to this dense material is a guaranteed recipe for failure. Our local experience proves that understanding the physical properties of the wall is the first step to a successful repair.
Key Differences at a Glance
The variations become crystal clear when you look at the raw specifications. Proper preparation is the most critical phase of old home interior painting. Reviewing these facts before buying any materials is highly recommended.
| Feature | Historic Plaster | Standard Drywall |
|---|---|---|
| Total Thickness | 7/8 to 1 inch (three layered coats) | 1/2 inch (single factory panel) |
| Impact Resistance | Rock-hard density that deflects damage | Soft core that dents easily |
| Common Damage | Hairline cracks from house settling | Puncture holes and popped screws |
| Repair Material | Setting-type joint compounds | Premixed drying compounds |
Standard Plaster Prep Sequence
Our standard procedure for repairing these walls involves keying out the cracks, applying setting-type joint compounds, and using high-adhesion primers. Skipping any of these foundational steps will almost certainly cause the damage to reappear within a few short months. The process demands specific tools and a bit more patience than a quick weekend spackle job. We always break the repair down into a few non-negotiable stages.
Step-by-Step Repair Methods
Proper assessment is the absolute foundation of any lasting fix. Tap-testing suspect areas will quickly reveal if the heavy material has detached from the wooden lath behind it. Our technicians follow a strict protocol to ensure permanent adhesion.
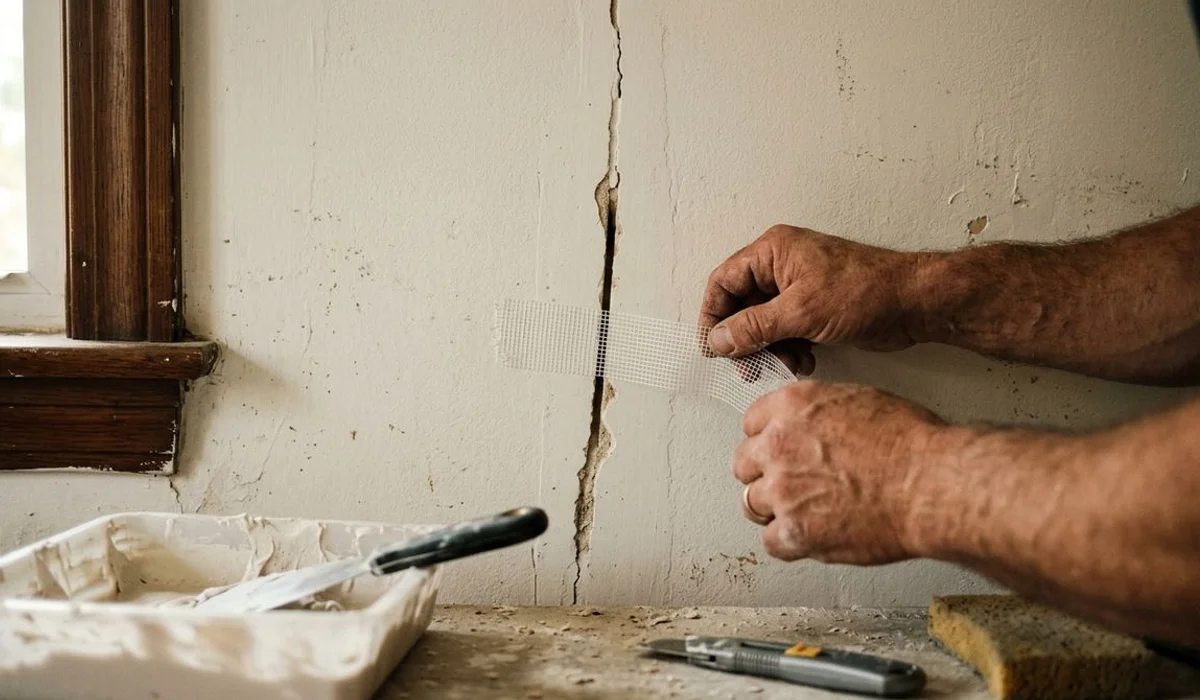
- Key the Cracks: Use a painter’s 5-in-1 tool or an oscillating multi-tool to create a v-groove in moving cracks. This gives the new compound a solid surface to bite into.
- Tape and Base Compound: Apply fiberglass mesh tape over any fissure larger than a hairline. Fill the depth with a hard-setting mud like USG Sheetrock Durabond 90, which provides a plaster-like surface that resists humidity.
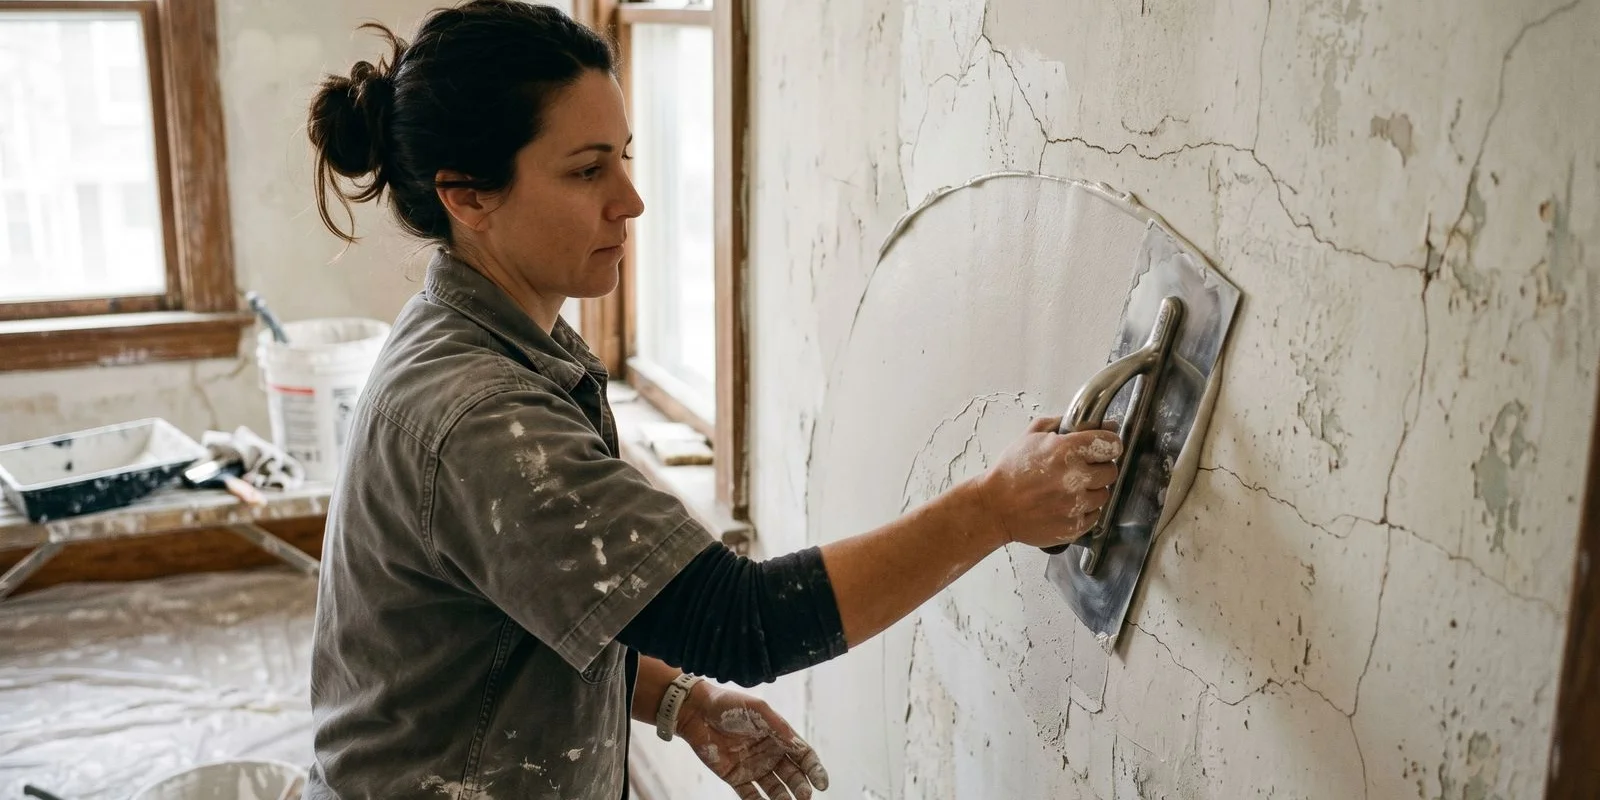
- Skim Coat and Sand: Because Durabond dries like concrete, keep it below the wall surface. Finish with a lighter setting compound, like USG Easy Sand 20, and blend with 150-grit sandpaper.
- Seal and Prime: Lock down the raw patches with a specialized plaster paint primer like Zinsser Gardz. Use Zinsser Bulls Eye 1-2-3 for general walls, or an oil-based primer for brand new plaster.
We finish the job with two topcoats of a premium acrylic paint. Fresh lime-based materials need a full 30 days to cure before they can safely accept this topcoat.
Common Failure Modes We See
The most frequent issues stem from painting over loose materials, ignoring calcimine coatings, and using incorrect patching products. Paint simply does not have the tensile strength to hold a failing wall together. Our teams regularly fix walls where a previous owner tried to hide structural problems beneath a fresh coat of latex. Loose sections absolutely need re-attachment with plaster washers or complete replacement before a brush ever touches them.
Another widespread mistake is using basic vinyl spackle for wide gaps. Standard spackle lacks flexibility, meaning those cracks will inevitably telegraph right back through the wall within a year.
The Calcimine Ceiling Trap
We also frequently encounter the dreaded calcimine ceiling peeling effect in older dining rooms and bedrooms. Calcimine is a chalky, calcium carbonate coating widely used in the early 20th century because it dried quickly over fresh plaster. Applying modern water-based latex paint directly over old calcimine causes massive blistering and immediate delamination. Our solution involves either scrubbing the chalky layer off completely or sealing it with an oil-based calcimine coater like Zinsser Cover Stain.
Warning Signs of Impending Paint Failure
Catching these issues early saves countless hours of frustrating rework. You should inspect your walls closely before buying supplies. We encourage homeowners to look for these specific red flags.
- Alligatoring and Blistering: This severe peeling is often caused by incompatible layers, such as latex applied directly over an unsealed calcimine ceiling.
- Patchy Sheen (Flashing): This happens when raw plaster absorbs paint unevenly because a proper sealing primer was skipped.
- Spongy Walls: If the wall pushes in when you press it, the plaster keys have broken off the wood lath entirely.
Lead-Safe Note
Any historic home renovation must account for the presence of dangerous heavy metals in original surface layers. The State of New Jersey recently reinforced these safety standards with strict new legislation. Our crews operate under the assumption that homes built before 1978 contain lead paint until testing proves otherwise.
Under the NJ P.L. 2021 Chapter 182 law, which mandated initial compliance by July 2024, many pre-1978 rental properties now require recurring lead-based paint inspections.
Regulatory Insight: The recent New Jersey lead-based paint inspection mandates make professional containment procedures more important than ever for property owners in historic districts.
Attempting to scrape dry lead paint without HEPA vacuums and plastic barriers creates a severe respiratory hazard. We strictly utilize proper Lead-safe containment, which is legally required and essential for health when disturbing these old coatings.
Leaving this specific phase to certified professionals is the smartest way to protect your household. You can completely avoid the risk of toxic dust exposure by hiring trained experts. We are ready to help when you decide to safely tackle your plaster wall repair NJ project.
If you are looking for assistance with painting plaster walls NJ properties require, reach out today. Ready for plaster work? See our interior painting service page to get your historic home looking beautiful again.