Why caulking and wood rot repair are the most important exterior prep steps — and how we handle them.
You know how frustrating it is to spot peeling paint just a couple of years after a major exterior project. That premature failure almost always traces back to inadequate exterior paint prep.
Our team consistently finds that skipping proper caulking before exterior paint leaves siding completely vulnerable to water damage.
Trapped moisture expands during harsh winter freezes, which forces the topcoat to bubble and crack from the inside out.
We’re going to walk you through the exact sequence professionals use to seal and repair your siding. You’ll see the specific products that actually hold up, the true cost of preparation, and why sealing every gap matters so much.
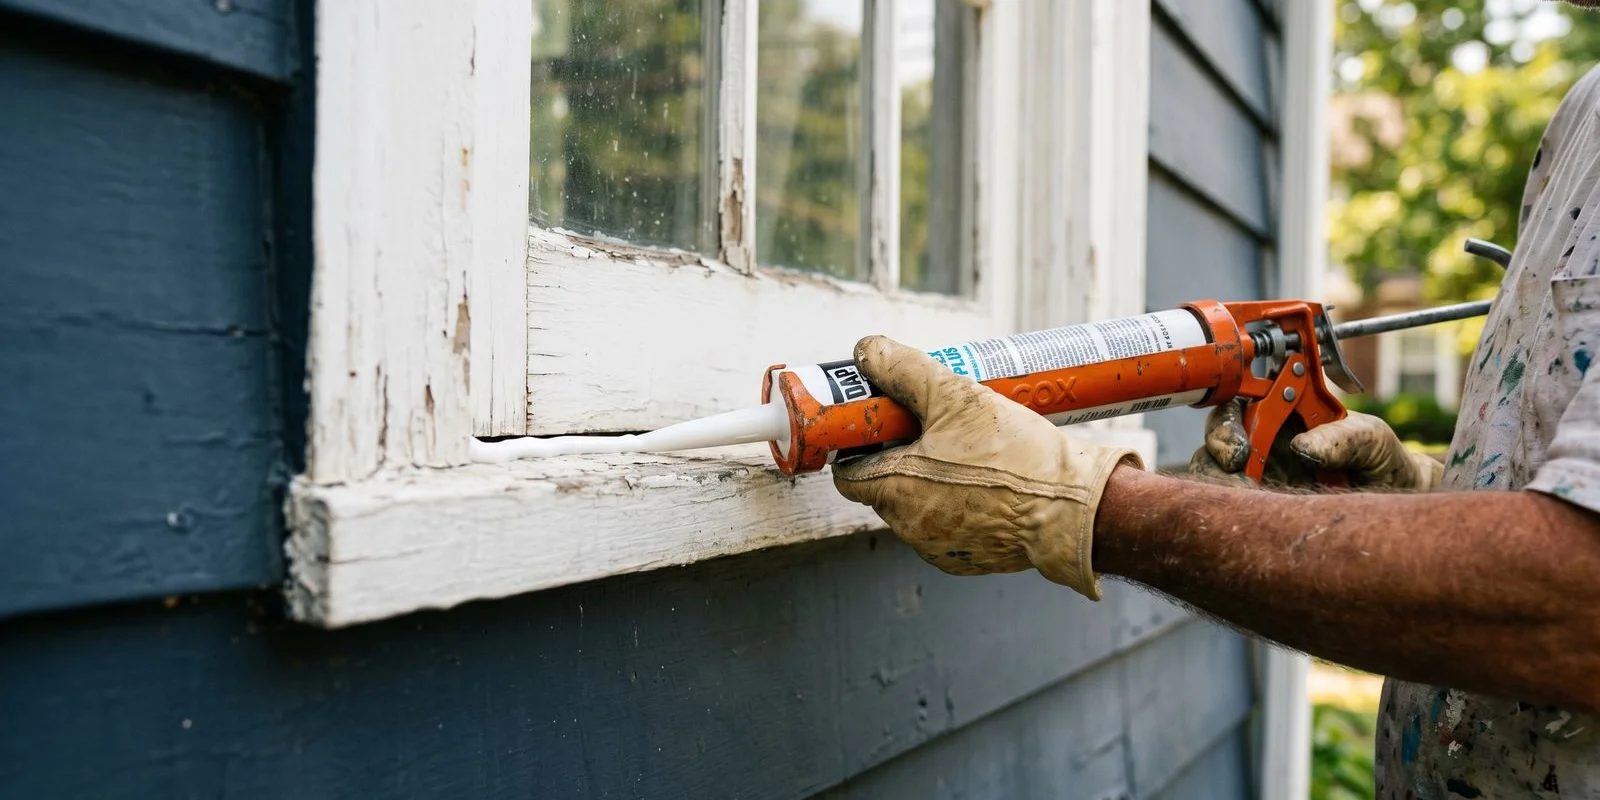
Why Caulking Before Exterior Paint Matters
Caulking seals every joint where water could easily enter your home. A missed caulk line becomes an active moisture entry point along vulnerable transitions.
We focus heavily on sealing the following critical exterior joints:
- Trim-to-siding connections
- Window trim and door casings
- Eaves and soffit gaps
- The tops of decorative shutters
- Corner boards and fascia
Professional crews treat moisture behind paint as the number one cause of exterior paint failure. Water vapor easily permeates compromised seams and then pushes the new paint off the wood as it tries to escape.
Those tiny gaps might look harmless, but they cause massive problems during our harsh New Jersey winters. A gap as small as one-sixteenth of an inch lets driving rain soak into the end grain of your structural wood.
We close off these vulnerable areas completely before any primer touches the house.
Our Standard Caulk Products
Using the right product is just as important as where you apply it. Different joints expand and contract at different rates, which means one type of sealant simply cannot handle the entire house.
We rely on a highly specific lineup of commercial-grade sealants to handle Northeast weather. Every tube we use is selected for its elasticity, paint compatibility, and expected lifespan.
Here is the exact breakdown of the siliconized acrylic caulk and sealants used on our projects:
| Application Area | Preferred Product | Key Specifications |
|---|---|---|
| General Seams & Trim | Sherwin-Williams 950A Siliconized Acrylic | 55-year limited warranty, UL GREENGUARD certified, ready to paint in 2 hours |
| High-Movement Joints | Polyurethane (Sikaflex or Vulkem) | Designed for siding-to-foundation transitions, extreme flexibility |
| Non-Paintable Areas | 100% Silicone (GE Commercial) | Used exclusively for roof flashing and bare metal, completely waterproof |
Our team exclusively uses Sherwin-Williams 950A for the vast majority of wood and siding seams. This specific formula costs around $5.50 per tube, but the 55-year warranty and superior adhesion prevent the premature cracking you see with budget options.
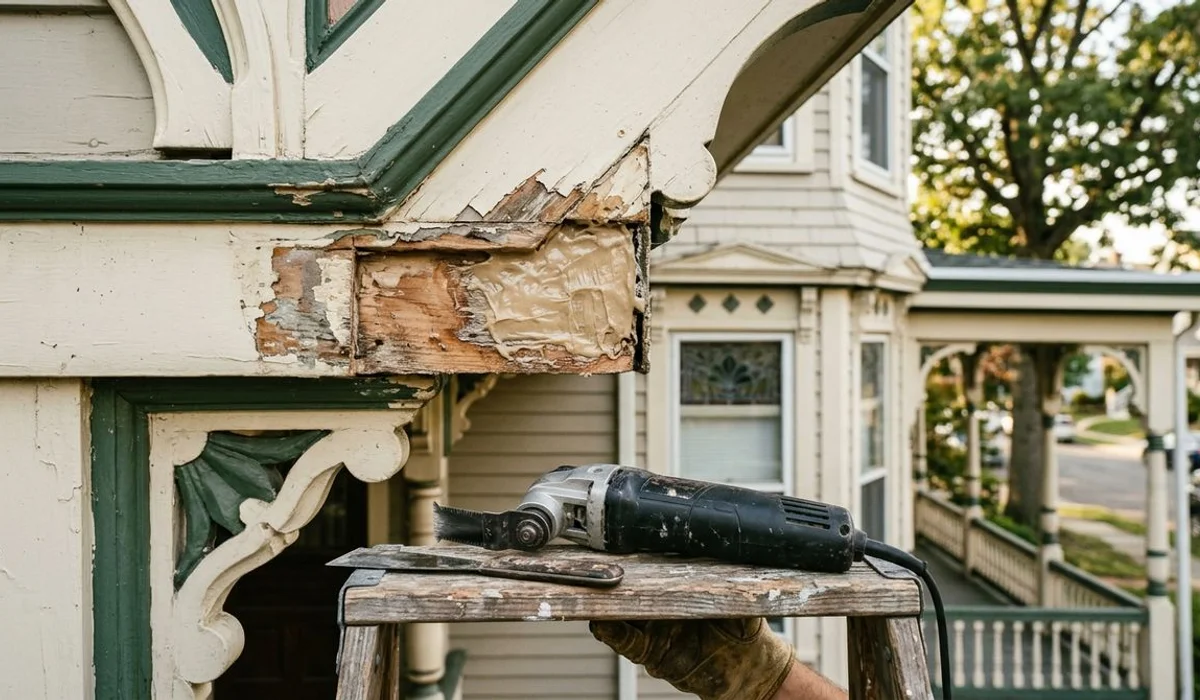
Wood Rot Repair Sequence
Finding and fixing decayed wood is a mandatory step in our prep process. Painting over soft, spongy boards only hides the problem for a few months before the paint starts peeling again.
We follow a strict, eight-step wood rot repair before painting protocol. This systematic approach permanently restores the architectural details of your home without requiring full board replacements.
Assessment and Removal
The assessment process begins by aggressively probing suspect areas with an awl or a sturdy screwdriver. Any soft wood indicates active rot that needs immediate attention.
Removing the decayed material comes next. A small hand saw, chisel, or oscillating tool easily clears away the rot back to sound, solid wood.
Chemical Treatment and Consolidation
We then apply a borate wood treatment, like BoraCare, directly to the exposed cavity. This chemical application actively inhibits future fungal growth and prevents rot from returning to that exact spot.
Applying a two-part epoxy consolidant hardens the remaining wood fibers. Products like Abatron LiquidWood penetrate deeply into the porous wood, turning the soft edges into a solid, structural base.
Filling and Finishing
The preferred filler on our job sites is a two-part epoxy like Abatron WoodEpox. This compound gives us a 20 to 30 minute working time, never shrinks, and allows us to sculpt the repair to match the original wood profile perfectly.
We smooth the hardened epoxy to blend flawlessly with the surrounding wood once it cures. The cured repair is dense enough to be sanded, drilled, or routed just like real lumber.
Applying a high-quality oil or bonding primer prepares the new surface for the final finish. The topcoat then blends the repaired section invisibly into the rest of the siding.
Structural Replacement
Sometimes the damage goes far beyond the surface level. Rot that extends deeply into your home requires a completely different approach.
We immediately identify structural deterioration during our initial walkthrough. Standard epoxy fillers are no longer safe or effective when decay reaches critical load-bearing areas.
These structural components require full replacement rather than surface repair:
- Main sill plates resting on the foundation
- Window and door headers
- Load-bearing corner posts
- Sub-surface roof sheathing
Our estimators itemize these structural replacements entirely separately from the standard painting quote. Throwing expensive paint over failing structural wood is a complete waste of your money.
A qualified carpenter must remove the damaged framing and install fresh lumber. The new wood provides a solid, safe foundation that will hold paint beautifully for decades.
Pressure Washing: Correct PSI
A clean surface is essential, but blasting your siding with maximum pressure causes permanent damage. The goal is to remove chalking paint, dirt, and mildew without scoring the wood or forcing water behind the panels.
We calibrate our pressure washing equipment specifically for the material we are cleaning. Using 3,000 PSI on soft cedar will chew up the wood fibers and create a fuzzy texture that looks terrible when painted.
Professional exterior painters adhere strictly to the following safe pressure ranges for different siding types:
| Siding Material | Recommended Pressure | Specific Technique |
|---|---|---|
| Wood Siding | 500 to 1,200 PSI | Use a wide fan tip, keep the nozzle 12 inches from the surface |
| Fiber Cement | 1,000 to 1,500 PSI | Keep the wand moving to avoid etching the finish |
| Vinyl Siding | 500 to 1,000 PSI | Angle the spray downward to prevent water from shooting under the overlaps |
| Stucco Surfaces | 1,000 PSI maximum | Hold the wand at a 15 to 30 degree angle to avoid chipping the masonry |
Our crews angle the spray carefully to prevent water from becoming trapped in the wall cavity. You must allow the entire exterior to dry completely before applying any primer or caulk.
Why Prep Costs What It Does
Proper preparation is the most labor-intensive part of any exterior project. Many homeowners are surprised by the initial quote until they see exactly how much work happens before a paint can is even opened.
We routinely dedicate 50 to 60 percent of the total labor budget purely to surface preparation. The actual application of the topcoat accounts for less than half of the time our crews spend on site.
The following necessary steps drive the majority of those preparation expenses:
- Intensive scraping and power sanding of failing paint
- Chemical treating and epoxy filling of rotted wood
- Precise caulking of every single exterior seam
- Spot priming exposed wood with high-adhesion primers
Recent 2026 data shows that thorough exterior prep work adds $500 to $2,000 to the total cost of an average New Jersey paint job. Exterior painting projects currently range from $2.00 to $5.50 per square foot based largely on the condition of the existing siding.
Our pricing reflects the reality that cheap prep work always results in a failed finish by year three. Paying for detailed surface restoration upfront is much cheaper than repainting the entire house again in thirty-six months.
If your home is showing signs of wear, taking action now prevents minor peeling from becoming major structural damage. Proper caulking before exterior paint protects your biggest investment against the harshest weather.
See why exterior paint peels and our exterior painting service to learn exactly how to protect your property.